Learn to Play the Guitar
learning the guitar has never been so easy!
WARNING: Read this before you move on..
In our effort to deliver better content to our viewers, we are giving away the ultimate “Learn to Play Guitar” guide, which consists of 27 in-depth guitar-playing lessons, and many more golden tips – for free! Enter your Name & Email below and we’ll send you the eBook instantly. This is a limited-time offer, and will be called of once 50 users download this eBook. Are you in.. or out? We’ll find out soon enough..
Your privacy is important to us. We will never sell, rent, share or spam your email address.
Welcome to LearnPlayGuitar.org
Here’s presenting, a site loaded with tips, tricks, lessons, guides and lots more for guitar freaks. It doesn’t matter if you’re a newbie or a seasoned pro – the information on this site is bound to help you. We, at LearnPlayGuitar.org are dedicated to help you to play your guitar fast, smooth, and better. If you’re a newbie to playing a guitar, we recommend you should read our Guitar Lessons. (They’ll help you to play any song on your guitar literally overnight!) If you’re a seasoned pro, go through the General Information section. If you like this site, feel free to bookmark it on your computer (for future reference) as well on various social bookmarking sites like Digg, StumbleUpon, Propller etc. Also, make sure you check out this awesome website for Free Sheet Music. If you have any questions, feel free to Contact Us. Thank you for visiting us & we hope you enjoy your stay whilst you’re here!
-The LearnPlayGuitar.org Team.
MAY16
Lesson 1: How to be able to play the Guitar overnightIntroduction:
Before starting, you have to remove all thoughts in your mind that tell you that playing a guitar is difficult. Be positive – think that you can do it. Many people think playing the guitar is the work of a genius – but it isn’t. Its actually very easy once you get the drift. Now wait, to master it might be the work of a genius, but to play songs on the guitar is easy – and these lessons are going to help you for that very purpose. I’ve been playing & teaching the guitar for many years and I’ve been practicing since I was a child. I’ve taught many of my friends & family members also, and most of them were able to play a song or two practically overnight. You have to be dedicated & passionate, and learning it will be as easy as A-B-C. I’m not joking. This first lesson will give you an absolute kick start – are you ready to rock & roll? Good! Lets start..
And so.. we start..
Go get your guitar! Before going on, I’m assuming that you know how to hold a guitar and pluck the strings either with your fingers or with a guitar ‘pick’. If not, don’t worry. I’ll teach you..
PS: If you’re left-handed, DO EVERYTHING OPPOSITE. i.e. ‘left upper thigh’ etc.

Please remember: Playing the guitar for continuous hours will strain your back.
Solution: Maintain an upright posture. Now, pick up the guitar and place the back of it against your stomach. If you are right handed, the guitar neck should be pointing towards your left. Rest the guitar body on your right upper thigh (Opposite for left-handers).
Now place your left hand around the guitar neck and place your right arm around the body so that your hand is lying by the strings. Adjust your body positioning so that you are completely comfortable. Ready for the next stage? Cool!
Hand Positioning
If you’re a leftie, don’t worry. You have three options here. The first option is to buy a right-handed guitar and re-string it, so that the order of the strings in the above image is reversed. The second option you have is to buy a left-handed guitar. The third and final option is to learn right-handed – I’ve seen many of my friends doing this. And its not as difficult as you think! ![]()
If you’re right handed, you will use your left hand to construct chords. The left hand fingers are bent and pressing down on the strings on the fret board. The back of the neck is curved, so that your hand molds into the shape of the neck. Your thumb is arching aver the top of the neck. This is a common thumb position for constructing chords. It is also OK to press your thumb into the back of the guitar neck when constructing chords, although this is more common when playing scales. Try out both thumb positions and use the one that is most comfortable for you.
Right Hand/Arm
This is the hand that you will use to “strum” the strings to make the different chord sounds. Rest/Lie your right arm over the guitar. Your right bicept should be resting on the top of the body of the guitar. Your hand should be positioned directly above the sound hole in the guitar. This is where the sound is produced.
Using a Pick
You should grasp the pick between your thumb and forefinger of your right hand. In this section we’ll cover Guitar Tablature or “TAB” for short. This system allows you to get propelled into playing songs and ‘riffs’ on the guitar almost immediately! Guitar Tab is a universal language among musicians and even professionals use it as a reference. After this lesson, you will be able to Google the Guitar Tab for pretty much any song that you want and be playing the melody line or main riff within minutes!
What is Guitar Tab?
It is an alternative way of reading music. Instead of reading notes on staff paper which can be quite tricky, it is made up of a number system that is so easy my grandma can play ‘smoke on the water’ with ease!! NO joke. The following 6 lines do not represent your typical ‘music staff’ which actually has 5 lines. These 6 lines represent the 6 strings on your guitar. The Top Line represents the thinnest or ‘highest pitched’ string on your guitar. The string that is closest to the floor. The bottom Line represents the LOWEST SOUNDING String on the guitar and this one is the thickest. It also is the closest to the ceiling.
String #
____________________________________________________ 1 ____________________________________________________ 2 T____________________________________________________ 3 A____________________________________________________ 4 B____________________________________________________ 5 ____________________________________________________ 6
Now..
This is what blank Guitar Tab looks like. Right now all you see are the 6 lines (6 Strings) I know you’re thinking “why is it upside down?” I have no idea. That’s how Tablature was invented. Just imagine the bottom line as being the top string that’s closest to you. With that out of the way we can work on our next keyword. “Frets.”
I am sure you have heard this term before ‘Guitar Frets.’ If not, they are the metal strips that go up and down across the fingerboard of the guitar. They separate the notes (tones) on the guitar. When you place your finger (form your left hand) in between two frets and hold down the string you are then prepared to strum or pick the string with your right hand. Strings aren’t meant to only be played open. When you hold down a string at a given ‘fret’ what you are actually doing is making the string shorter, thus making the pitch ‘Higher’ and changing the note (or tone). There are usually about 20 something frets on a standard guitar. It doesn’t make a big difference if you have 20, 22, or 24 frets on your guitar. This just means that you can play a couple notes higher on the guitar and those notes are so high pitched they are pretty annoying to listen to anyway! You will stay in the lower range of the guitar most of the time. Now let’s get this ‘Higher’ and ‘Lower’ thing straight. In music, the musical notes (tones, pitches, whatever you call them) are changed by pitch. We all know that pitch means the frequency of sound so something high pitchedwould be like an opera singing lady who breaks a wine glass with a super high note.
A Low pitch is similar to a Bass instrument or a man with a really deep voice. ‘Deep’ is the same as ‘Low’ when talking about pitch. On a slide whistle you blow into it and move the slide up and down to change the pitch. The closer you bring the slide to you the higher the pitch gets and vise versa. On the guitar however it is not up and down. It is left to right. When you play a string open, that is the lowest (deepest) sound you will hear produced from that string. As soon as you place your finger on the First ‘Fret’ and then strike the same string again the pitch will be slightly higher. The more you move to the right the higher the pitch will get. (Because the string is getting shorter!). There are usually dots on the fingerboard of your guitar to act as a guide when moving around and holding down different frets. Normally they are on the 3rd, 5th, 7th, 9th and 12th frets.
*TIP*: You don’t want to put your finger on the metal fret itself…but just slightly to the right of it produces the best sound.
Let’s Play Already..!
Ok, cool! Now that we know what frets are, we know how to play a note (playing either an open string, or pressing down a fret on that string and then strumming it) And we know what ‘Blank’ TAB music looks like. Let’s learn how to read TAB and how it will help you. The lines represent the strings. The NUMBERS represent the Frets.
____________________________________________________ ____________________________________________________ ____________________________________________________ ____________________________________________________ ____________________________________________________ _0_3_5_0_3_6_5_____________________________________
Music (and TAB) is read from left to right like English. The ‘TAB’ above tells you to play on the Low string only (the thickest string) You know this because the numbers are only written on that string (the bottom line) The number ‘0’ means to play the string open. Then the number ‘3’ means place your index finger of your left hand and hold down the 3rd fret on the low string (same string you played open). and then followed by the 5th fret and so on.
This is the main riff to the popular song ‘Smoke on the Water.’ If you are unfamiliar with this song you can see it and view at on Youtube. Type in ‘Smoke on the Water.’ this way you will know what it sounds like before you attempt to play it by reading it above. So if you play the string open (just strum the string without touching it with your left hand) and then the 3rd fret and then the 5th and then open again, and then the 3rd fret 6th fret and 5th fret…you have you have just played smoke on the water! Try this next song…EVERYBODY Knows the tune from ‘Mary Had a Little Lamb’ so you shouldn’t have any trouble with it. ‘Mary Had a Little Lamb’
____________________________________________________ high string ____________________________________________________ ____________________________________________________ ____________________________________________________ _____________________________2_2____________________ _4_2_0_2__4_4_4__2_2_2__4__________________________ LOW String
The first 4 notes (4,2,0,2) sound like “ma-ry had a” and then the three 4’s (444) sounds like “lit-tle lamb” and then again with three 2’s (222) is again “lit-tle lamb” and then the 4 on the low string and the two 2’s on the next string sound like the final “lit-tle lamb” Notice how the last two notes are on the next string. This would be the second string from the closest string to you. It is also the second most thick string on the guitar. REMEMBER: With guitar TAB you must already be familiar with the melody and rhythm of the song because even though the TAB shows you which notes to play to make the song, it does not show you how ‘long’ to hold each note in order to make the song sound right.
For example, reading the above song ‘Mary Had a Little Lamb’ by just playing all the notes in a row without giving the proper time for each note would not sound very much like that song at all! You know to put a pause in between ‘little lamb’ and the next ‘little lamb’. Also, you know that the last ‘lamb’ is held for a slightly longer amount of time than the rest. Here is a scale study for the guitar. This will sound like (Do-Re-Mi-Fa-Sol-La-Ti-Do) It is know as the ‘Major Scale’ and plays a HUGE part in music in general. It is also a great finger strengthening exercise for the guitar player. This requires you to play on three strings. Frets # 3 and 5 on the LOW string. Followed by Frets # 2, 3 and 5 on the very next string. Lastly, frets # 2, 4, 5 on the 3rd string. Executed correctly it should sound like Do-Re-Mi-Fa-Sol-La-Ti-Do.
____________________________________________________ high string ____________________________________________________ ____________________________________________________ _____________2_4_5__________________________________ ______2_3_5_________________________________________ _3_5________________________________________________ LOW String
As stated in the beginning of this report, it is not intended for you to become a master overnight. But, with this information and the fabulous world of the internet and countless resources available you can take this as far as you want.
Many famous musicians to this day do not know how to read music and 99% of them know TAB and can learn a song or solo quickly by reading the TAB. There are SO many FREE websites that have the TAB to almost every song! Go to google and type in Guitar Tab for (song you want to learn) and it will surely pop right up. Remember that the bottom line is the string closest to you…DON’T let that fool you.
The TOP Line is the guitar string closest to the floor. We didn’t even play on that string this lesson.
CONGRATULATIONS! You now know how to hold the guitar You now know how to play the very popular riff for ‘Smoke on the Water’ You know how to play a ‘major scale’ which is the foundation for modern music. You know how to read Guitar TAB! You know how to play ‘Mary Had a Little Lamb’
You can now go look up the TAB for any song you want to learn for FREE online!
.JPG)
Click here to view the enlarge version of the guitar anatomy picture.
That will be it all for the first lesson folks. Be sure to watch out for Lesson 2. We get into chords there!
Till then, happy playing – Enjoy!
The LearnPlayGuitar.org Team!
Posted in Guitar Lessons | 1 Comment »
MAY16
Lesson 2: How to be able to play the Guitar overnight
Introduction to Chords
Hey there, welcome back!
Been through Lesson 1? If not, click here.
In Lesson 1, you learned how to read and play Guitar TAB’s. I also taught you to play a couple of songs; namely ‘Smoke on the Water’ and ‘Major Scale’. I also taught you how to be able to play literally any song on your guitar by searching for their TAB on the internet. You deserve a pat on the back. The fact that you are here proves your dedication in learning the Guitar. Good job! Lesson 1 was your first step towards learning the guitar, and you’ve completed it – you should be proud of yourself!
So here’s presenting Lesson 2 of my course – Ready already? Excellent! Lets move on..
Guitar Chords…What are they?
I’m sure you might have heard the term “chord” before, but what does it mean? What exactly is a chord?
In Lesson 1, we learned that a “note” or a “musical tone” is basically any sound that a guitar would make. It is a definite pitch defined by a frequency of sound. We learned that a ‘note’ or a ‘musical tone’ is basically any sound that a guitar would make. It is a definite pitch defined by a frequency of sound. The science of it is not really that important for this lesson but when you put notes together you make music! This is called a melody. Notes being played in a ‘progression’ (one after another) produces a melody, while notes played ‘at the same time’ or on top of each other is a chord. If you tried just playing any three (or more) notes together you wouldn’t necessarily be playing a chord and it might not sound too pretty! So, to sum it up a chord is three or more notes played at the same time ‘in harmony’ meaning they sound good together!
Why are Chords Important?
In music, chords are of vital importance, and they are inevitable in guitar music.
When you hear someone playing a song on the guitar and singing along, they are playing chords in the background to fill in the ‘rhythm’ section of the song. Most songs – even classical music, consist of a ‘Melody Line’ and a ‘Chord Progression’. For example, in modern music the melody line would be “Wild thing, you make my heart sing” while the chords are being strummed in the background.
In classical music, the left hand on the piano or the ‘rhythm’ section of an orchestra would play the ‘chord progression’ while the main lead instrument or the right hand on the piano, would play the main melody line. I hope you follow me till here..
That’s fine, but How do I play chords?
There are 5 ‘open’ chords on the guitar. They are called ‘open chords’ because some of the notes in these chords are played as open strings that you don’t have to put fingers on frets to accomplish. That does not mean that the entire chord is just all open strings! Just a few notes of each of these 5 chords are open.
These chords are E, A, D, G and C.
Let’s learn ‘em!
You remember the guitar ‘TAB’ setup right?
_____________________________________________ String #1–High String _____________________________________________ T____________________________________________ A____________________________________________ B____________________________________________ _____________________________________________ String #6-Low String
Please Remember: The Top line is the highest sounding string that is closest to the floor when playing the guitar. The Bottom line is the LOW (thickest) String on the guitar.
This is the ‘TAB’ for an ‘Open E’ Chord, a very common chord on the guitar.
P.S: The 0’s mean to play that string OPEN without holding down any frets.
____0_________________________________________ ____0_________________________________________ T___1_________________________________________ A___2_________________________________________
B___2_________________________________________ ____0_________________________________________
Did you notice how the notes are stacked on top of each other? This simply means to play them at the same time! When they are written from left to right, then you play them one after the other….thus creating a melody line. When they are stacked, they are played at the same time thus creating a “Chord”. Simple, right?
So for this chord, you only have to hold down fret #2 on the two strings below the lowest string. I suggest using your middle finger for the first one and ring finger for the next, then you realize that the next string says fret #1 and your index finger is conveniently right there. It is always important to consider the best fingering for chords as they will help you play them easily and transition between them faster.
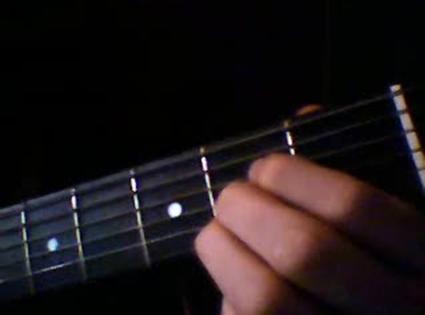
Here is a picture of someone playing an ‘Open E’ Chord! to give you a little bit more help!

Another Tip: Try to imagine making as much of a ‘claw’ as you can with your fingers so that none of your fingers touch the other strings. This can mute those notes and is a very common mistake people make when first starting to play guitar chords.
Only 3 frets are being held down here and 3 strings are being played ‘open’. Hopefully now you fully understand what an open chord is and have some ease playing this E chord. This is not a beginner chord and is VERY Popular in all styles of music particularly rock ‘n’ roll and blues.
Now Let’s Learn the Rest of the Open Chords!
The next open chord we will learn is the ‘open G’ Chord.
____3_________________________________________ ____0_________________________________________ T___0_________________________________________ A___0_________________________________________
B___2_________________________________________ ____3_________________________________________
Yes, this one has 3 open strings in it as well. This is another really popular chord on the guitar. The 3rd fret on the bottom line (lowest string) should be played with your middle finger, followed by the 2nd fret of the very next string played with index finger. Then you skip 3 strings and leave them open! The high string (closest to the floor) you play the 3rd fret with your ring or pinky finger which ever one is easier for you!

The Next open chord we will learn is the C Chord.
This chord has 2 open strings in it and one string that doesn’t get played at all!
This is common and you will see it with a few chords.
_______0______________________________________ _______1______________________________________ T______0______________________________________ A______2______________________________________ B______3______________________________________ _____X________________________________________
P.S: The ‘X’ on the lower string means do not play that string.
Simply start your strum on the next string, the one with the 3rd fret being held down.
Use your Ring finger for the 3rd fret. Then your middle finger for the 2nd fret on the next string. Skip a string (this one is played open) and place your index finger on the 1st fret of the second to last string. Finally, the last string is played open.
Here is a Big Picture of a ‘C Chord’:

I know this is a big picture but at least it will help you!
Tired already? Just 2 more to go..
Open ‘A’ Chord:
_____0________________________________________ _____2________________________________________ T____2________________________________________ A____2________________________________________ B____0________________________________________ _____X________________________________________
This chord is fairly easy. The bottom string is not played like in the ‘C’ Chord. Then we have an open string followed by the 2nd fret on three strings in a row! Finally, an open string at the top.
The Lowest String is neither played nor strummed.
The index finger is on the 2nd fret of the second string, followed by the middle finger and then the ring finger, ALL on the 2nd fret of three strings in a row. The top string is played open (string closest to the floor).
And the final chord..
The ‘D Chord’ will be our final Open Chord on the guitar. You’ll literally be amazed at how far you can go with just these 5 chords!
Open D Chord:
______2_______________________________________ ______3_______________________________________
T____2________________________________________ A____0________________________________________
B____X________________________________________
_____X________________________________________
The 2 “X’s” indicate that this chord has two strings that should not be played at all.
The two lowest strings. (this means that when strumming the chord with the right hand you will start on the string that says 0, you will not strum every string on the guitar like the first two chords.
The next string is played open, followed by your index finger on the 2nd fret and then your RING finger on the 3rd fret of the next string. Finally, your middle finger on the 2nd fret of the top string (closest to floor).
Picture of Open ‘D’ Chord:
Finally – That’s all, you’ve now learned how to play chords on the guitar, as well as you’ve learned all the 5 “chords”! Again, these are not beginner chords, these are professional level guitar chords that are used daily by guitarists and rock ‘n’ rollers all over the world! These are actually the most commonly used chords on the guitar and the most popular!
Go out and get yourself a songbook of your favorite artist for guitar. Most of the songbooks have the letter of the chord written right above the lyrics so you can follow along and learn the rhythm for your favorite songs just by reading “G, or C, or E, etc…”
You can also find the chords to many of your favorite songs by simply searching for them on google. Search for “Guitar Chords for _________ song”. Now, they are not always 100% correct but you will be able to tell if it is way off and you’ll also get some great free practice material!
This was Lesson #2 of a two-part lesson titled ‘How to be able to play the Guitar Overnight!’ I do have a third, separate lesson on the way that takes you even further into your journey in “guitardom”. The chords you learned in this lesson are all ‘Major’ Chords. In the next lesson, you will learn the ‘Minor’ Chords as well as the difference between Major and Minor chords. Also, we will begin to play songs using chords.
Thanks for taking your time for reading this. Now go get your guitar and practice. Enjoy!! If you have any queries, feel free to post a comment!
The LearnPlayGuitar.org Team!
Posted in Guitar Lessons | 6 Comments »
MAY16
How to Learn to Play the Guitar
With the increasing popularity of rock music during the last few decades, playing the guitar has become very appealing for many people. While there are many teenagers out there who dream of becoming rock superstars, there are also many people that want to learn how to play the guitar just for the sake of it. However, many of them don’t find the best way to learn guitar and after a few unsuccessful attempts, they finally give up.
First things first, there is no easy way to the learn guitar but some do prove better than others. I will now take you though what I think is the best way to learn to play guitar. Some may disagree but there is only one way to find out and that is to try it for your self.
Below are some tips and tricks that will give you good head start but by far the best way to learn to play guitar is to always practice and never give up.
Preparation
Always make sure your equipment is in good order and you guitar is tuned properly there is no point in trying to play guitar when you do every thing right and it still sounds wrong. Also try and find a space that is quite and free from distraction and noise if you do not concentrate it will make it a lot harder then it should be.
Know your guitar
Try to learn everything you can about your guitar. Find out what every thing is called and be able to find it quickly. One of the best ways to learn to play guitar is to know your guitar. Guitars are not all the same and each one sounds different, you will find this out as your experience grows and hopefully your enjoyment and appreciation of them does too.
Know your skill level
Be careful you don’t start too high you do not want to frustrate your self on the first day. Pick something easy to begin with, a lot of music books start you off with some simple strumming patterns and old songs. The best way to learn to play guitar is to start small and work your way up until you feel confident to progress to something harder and more entertaining.
Stick with what you know
By now I would hope you have the basics sorted out and are ready to move on to something harder. Try to find and artist you like and are familiar with and try and replicate parts of there songs. Sheet music for most bands are wildly available and I think is the most rewarding and the best way to learn to play guitar, because you are making a song you know and like.
Gain confidence
When you feel like your ready to progress try to focus all you time on one song and when you have it burnt it your memory organize a small group of friend or family to listen to you play. The best way to learn to play guitar is to have confidence in your self because the guitar is meant to be enjoyed by everyone. It is not much fun sitting in a dark room playing to your self.
Be positive
I really cannot stress enough on how important this is. I’ve seen many people give up in the starting stages since they keep repeating to themselves, “I cannot do this”, “This is not my cup of tea”, “This is too difficult” and so on. You have to be positive and know that you can do it. I promise you that if you follow this one tip, your journey would indeed be a lot LOT easier.
Also, different people have different learning needs. In addition, we also have different resources, different jobs, different errands to run and different schedules. If you’re not at the level you want, maybe it’s because you haven’t found the best way to learn guitar yet. There are several ways to learn how to play the guitar. Listed below are only a few of them.
Theory Books
There are thousands of theory books on the market that teach you how to play the guitar. Some of them are even very good and can provide you with all the information you need. Books are an inexpensive and comfortable strategy to learn how to play the guitar. Unfortunately, experience shows that for many of us they just don’t work. However, if you are a very patient person, a theory book might be the best way to learn guitar.
Video Lessons
Video guitar lessons are available on DVDs and video tapes in almost any music store, as well as on virtual shops. In addition, there are also some video lessons available online. Some of them are even free. Video lessons are more dynamic and have a better chance of keeping you focused. They have the advantage of allowing you to practice at home whenever you find the time to do it. However, the inconvenience is that you can’t benefit from the personalized attention and useful feedback a teacher could provide.
Private Lessons
If you are willing to dedicate a lot of time as well as some money to this, private lessons are definitely the best way to learn guitar. A good teacher can design a customized teaching program to suit your learning style and provide you with individualized attention and positive feedback to get you motivated. In addition, he/she can also spot and correct your mistakes very fast.
Learning by Ear
Learning the guitar by ear can be very fun, especially if you have some sort of musical bone in your body, and that bone is humming with lots of vibration, you might find that this is the best way to learn guitar for you. With the modern slowing down technology, it is much easier now than it used to be for our parents’ generation.
You should always keep in mind that playing the guitar should be fun. If you find it difficult or stressing, your learning strategy might have a lot to do with it. Sometimes you need to try several learning methods before finding the one that works best for you. However, if you really want to play the guitar like a pro and have enough time and money, taking up private lessons is probably the best way to go. Also, following the guitar lessons on this website can also give you a good headstart.
Posted in General Information | 2 Comments »
Pages: 1 2 3 4 5 6 7 Next
Categories
- General Information
- Guitar Lessons
Recent Posts
- Lesson 1: How to be able to play the Guitar overnight
- Lesson 2: How to be able to play the Guitar overnight
- How to Learn to Play the Guitar
- Learn to Play Guitar Fast
- History of the Guitar
Blogroll
- Free Sheet Music
Can’t find what you’re looking for? Use Google Search!
Meta
- Log in
- Entries RSS
- Comments RSS
- WordPress.org
Categories
General Information
Guitar Lessons
Recent Posts
Lesson 1: How to be able to play the Guitar overnight
Lesson 2: How to be able to play the Guitar overnight
How to Learn to Play the Guitar
Learn to Play Guitar Fast
History of the Guitar
Pages: 1 2 3 4 5 6 7 Next
Blogroll
Free Sheet Music
Can’t find what you’re looking for? Use Google Search!
Meta
Log in
Entries RSS
Comments RSS
WordPress.org